In this follow up post the calculations made earler are taken into practice and some sawdust is made.
Previously
During Making a Custom Frame: Theory the following dimensions were produced:
Time to chop them up
Tools & Material Used
-
Reclaimed 2x4
-
Scrap Wood
-
Wood Glue
-
Black Paint
-
Scrap Wood
-
Miter Saw
-
Table Saw
-
Clamp
-
Calipers
-
Sandpaper 80, 120, 500 grit
-
Sharp Chisel
-
Paint Brush
-
Homemade Frame Clamp
-
Carpenters Square
-
Glass Scribe
-
Homemade Mat Cutter
-
Hammer & Blunt Chisel
Materials
This frame will be made out of pine, specifically a piece of dimensional 2x4 from a local salvage shop:

Cutting the Moulding
The material starts as roughly 2”x4” with a corner taken out and several large knots in the middle.

- Step 1 - Cut a chunk from the middle, between obvious knots. The grain should be smooth and straight
- Step 2 - Cut the moulding blanks from the piece of stock
- Step 3 - Cut the cross section of the moulding from the blanks
Note the extra cut (#10) in step 3, this was due to the decision to resize the frame
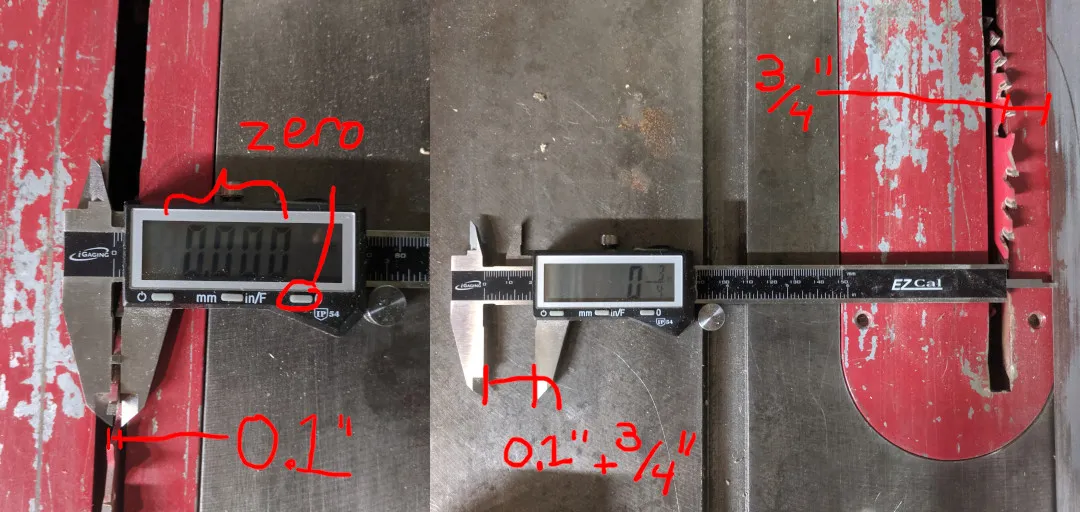
Accounting for Kerf
Kerf is the width of material that the saw blade cuts away. Using a zeroable caliper it is possible to set the fence to account for kerf without doing any math.
- Measure the table saw blade width
- Zero the caliper
- Set the desired fence distance on the caliper
- Adjust the fence to touch
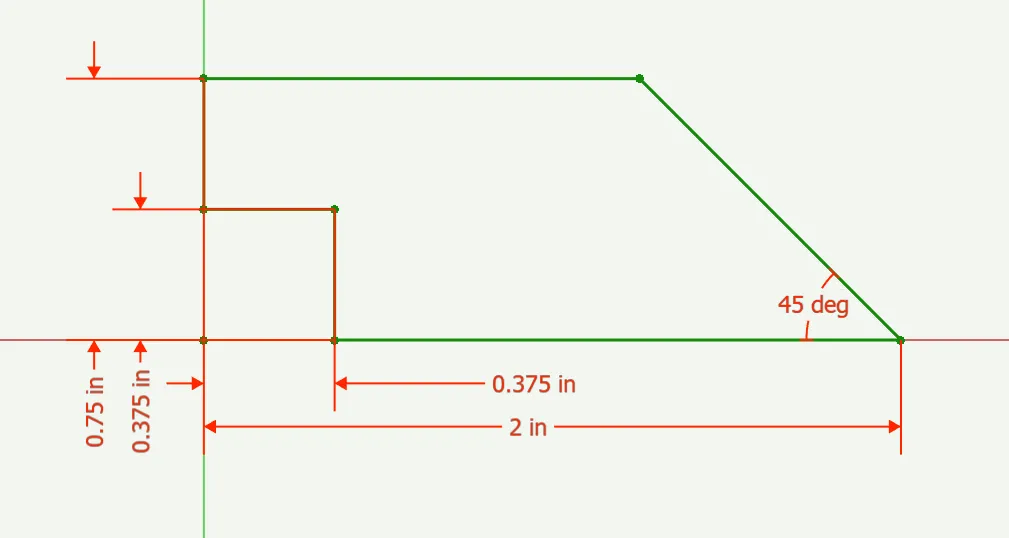
Cutting the Bevel
Table saws require care to be used safely. To ensure the work moves in a predictable manner a guide was clamped to the fence:

After cutting the first bevel the frame did not look as expected so another 3/8” was removed

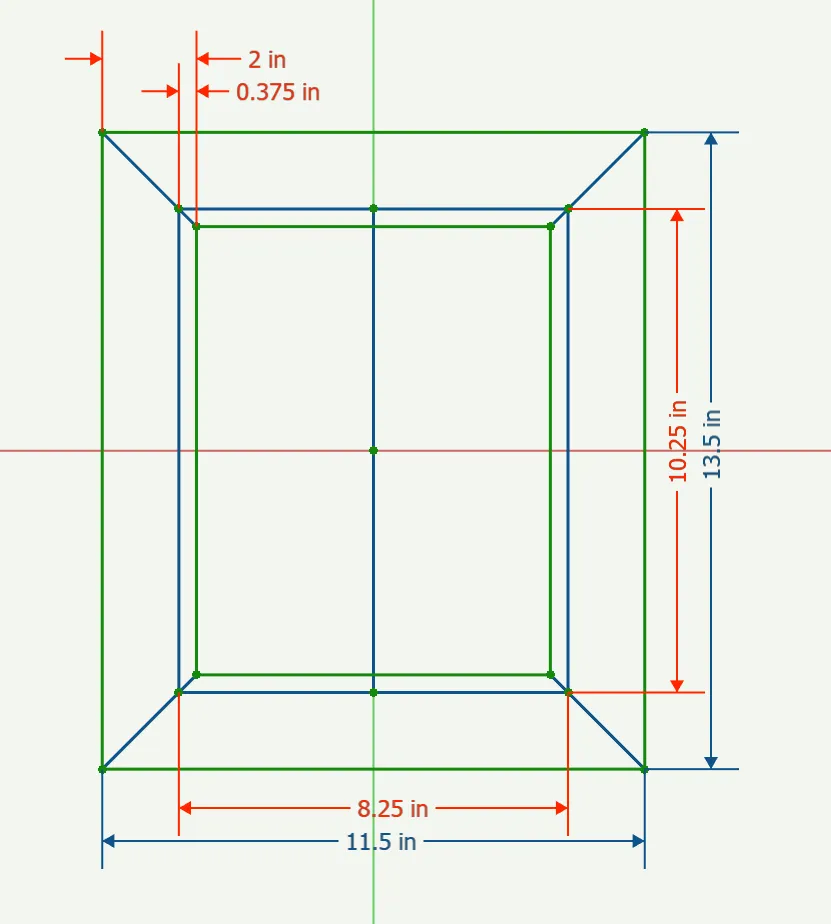
Recalculation to as-built dimensions
With the adjustment of the frame size the earlier calculations need to be redone to the as-built measurements, with the new frame width being 1.58" and the new rabbit depth being .36"
| step | calculation (inches) |
|---|---|
| base moulding width | 1.58" |
| minus rabbet width | 1.58 - 0.36 = 1.22" |
| doubled because two sides | 1.22 * 2 = 2.44" |
| plus allowance | 2.44 + 0.25 = 2.69" |
| total outside width | 2.69 + 8 = 10.69" |
| total outside height | 2.69 + 10 = 12.69" |
The 45(degree) corner is critically important to get accurate, a miter saw was used to ensure an accurate angle. By cutting a piece of cardboard and comparing to a reference it was discovered that the 45(degree) stop on the saw in the shop is very slightly off, so the lock is used to hold it of center.
Finishing
Several rounds of sandpaper from 80 grit down to 120 grit were used to get the material cleaned up before painting
Glue Up
Using a home made frame clamp (four shaped pieces of wood, a ratchet strap, some spacers, and a couple weights…) the parts are clamped together

After the glue dried a chisel was used to clean up the excess and the corners were sanded again
Painting
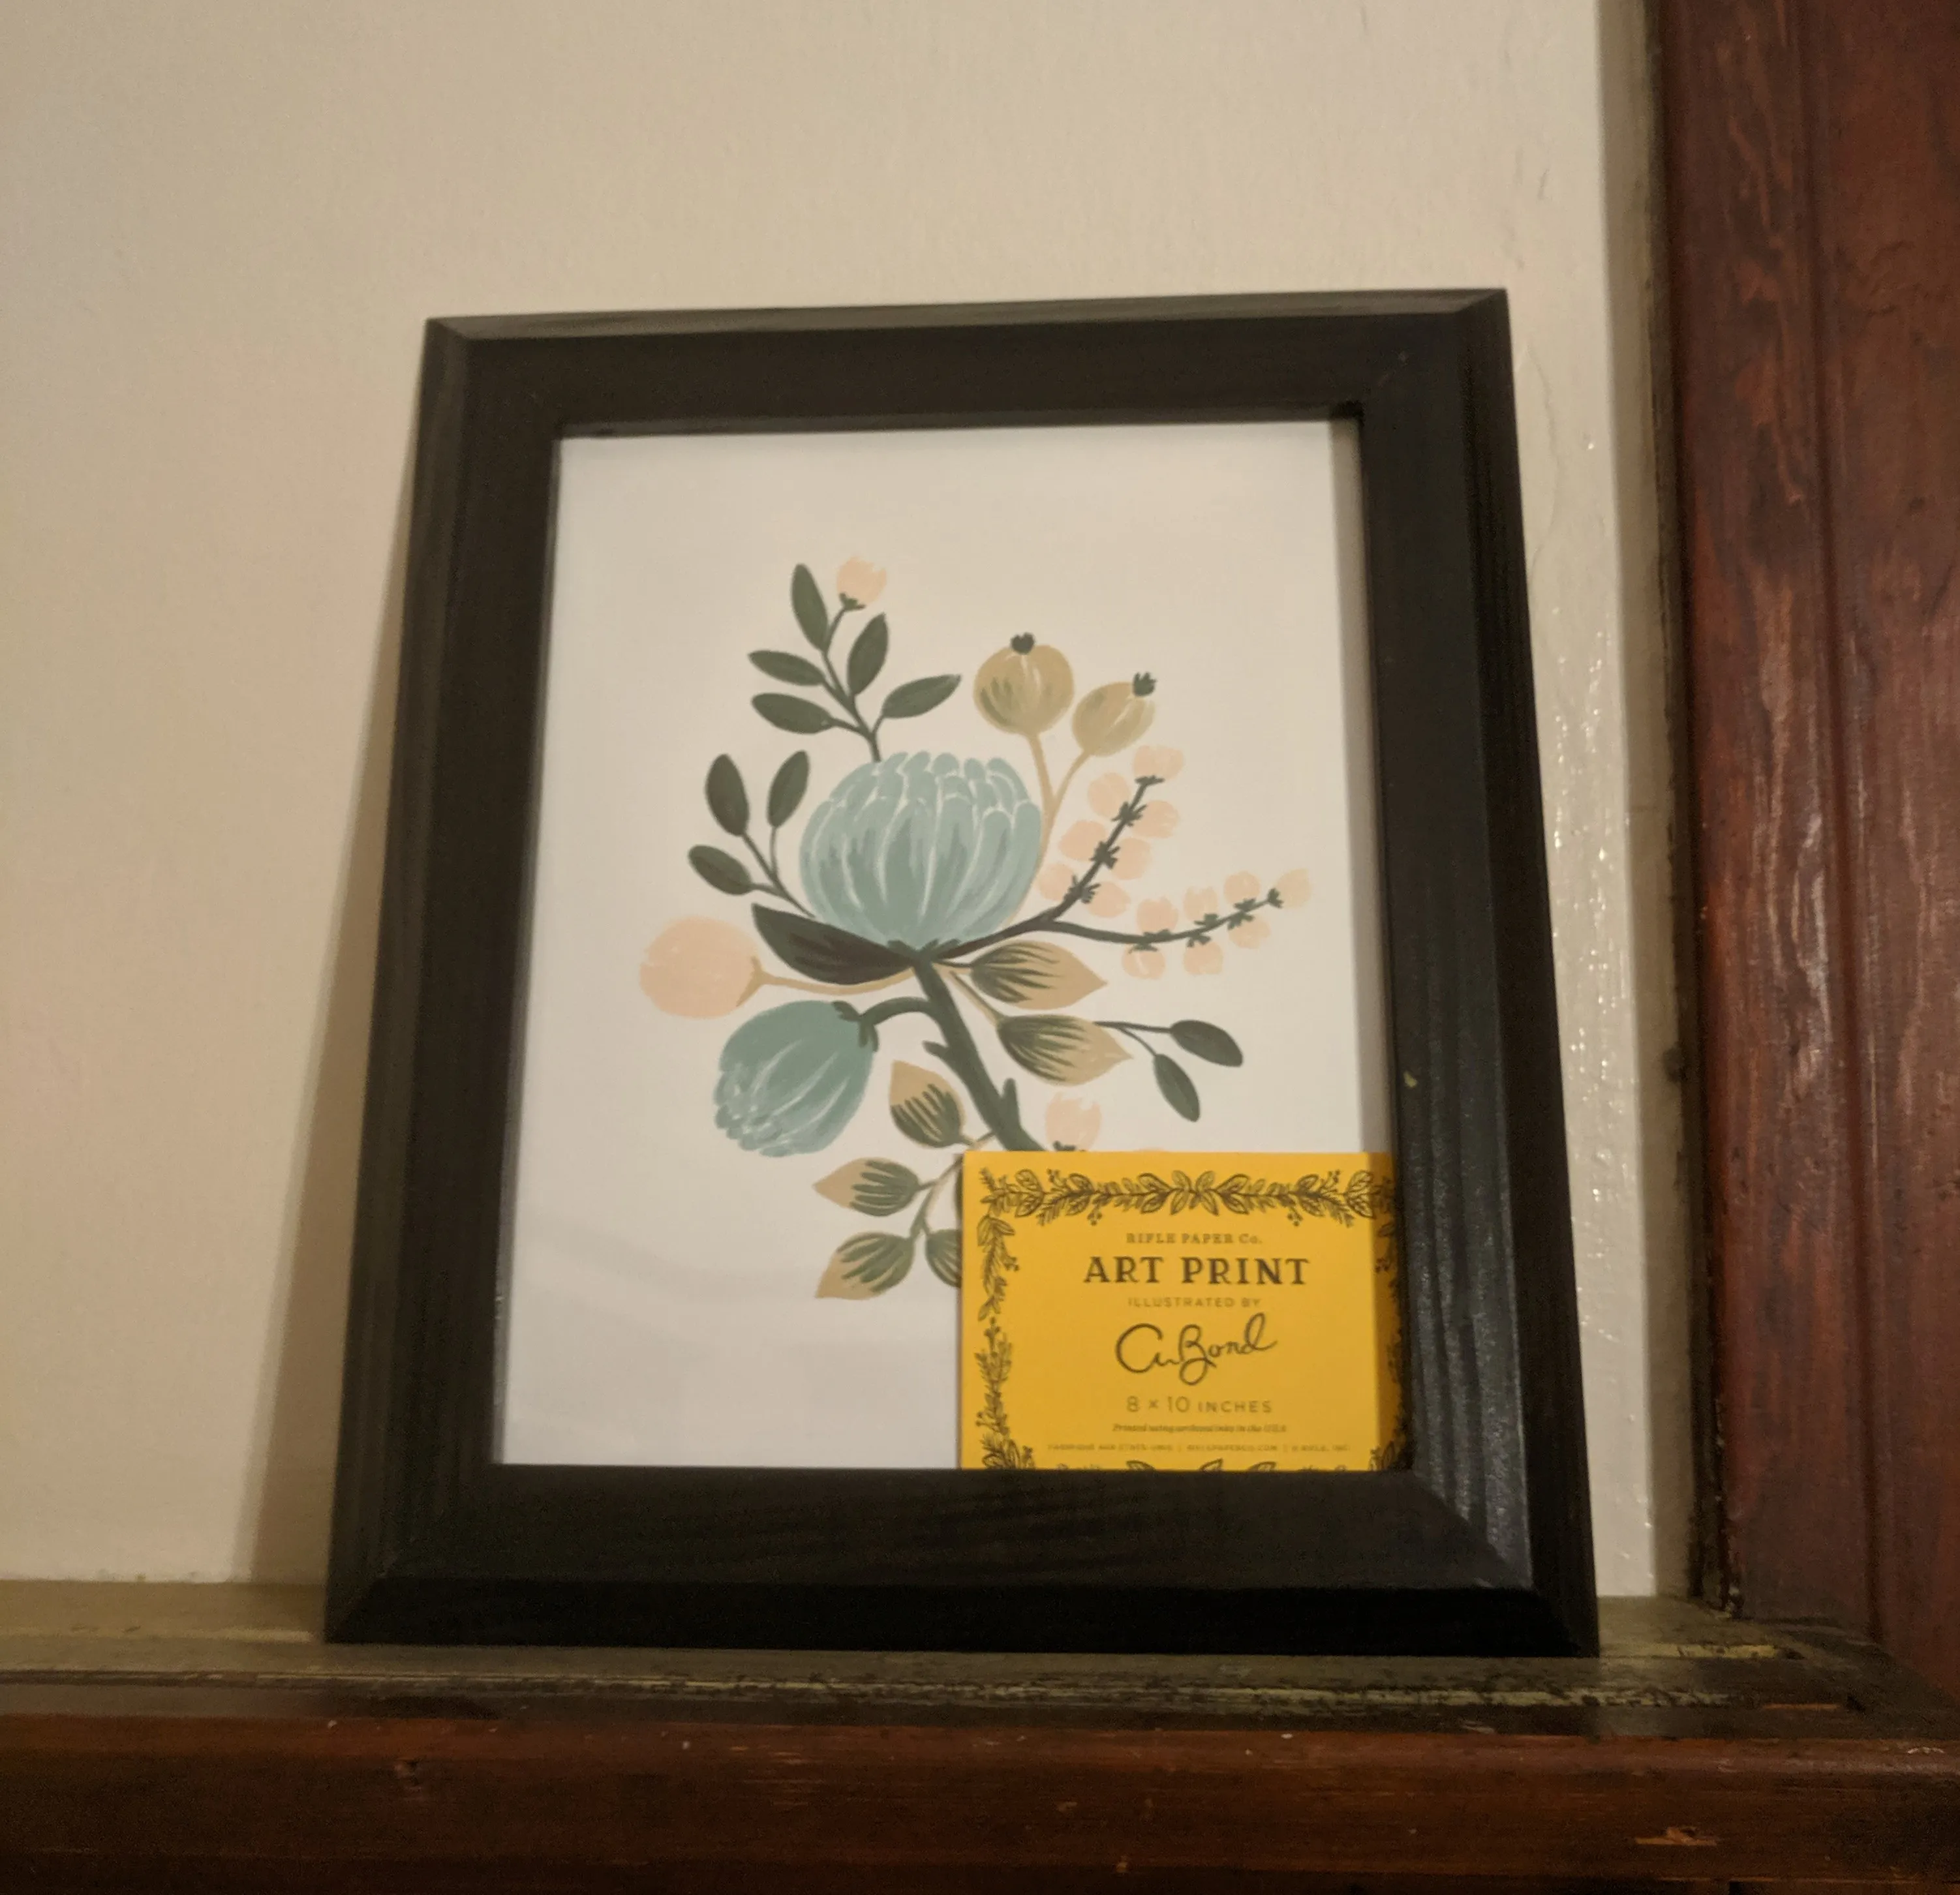
Two coats of black paint are added as black goes with everything (and more specifically it complements the artwork being framed)

Cutting the glass
The glass was cut to 8x10 by holding a square against a known straight edge and scoring against the other size of the square. Notes:
- The scribe will want to drift away from the square, angle it slightly inward
- The scribe will push the square which happily slides along the glass. Hold it tightly
- You must account for the distance between the edge of the scribe and the edge of the square
Once scribed grip the glass firmly and break, it should snap cleanly along the line
Cutting the backing material
A homemade mat cutter was used to ensure the backing material was cut squarely and accurately

Mat?
No mat was used due to the already present framing of the artwork by the white border of the print
Hammering points
After layering on the glass, print, and backing material a hammer and chisel were used to insert the points
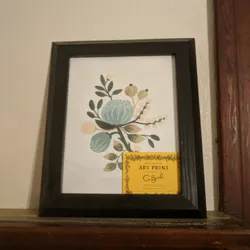
Finished product
The quality of the final product is dependent on how much care and precision is put into the previous steps